Netduino home hardware projects downloads community

Jump to content


The Netduino forums have been replaced by new forums at community.wildernesslabs.co. This site has been preserved for archival purposes only and the ability to make new accounts or posts has been turned off.

Dr Who

Member Since 08 Jun 2012
Offline Last Active Aug 16 2017 05:23 PM
-----

Topics I've Started

Can a Netduino model 1 power external logic directly?

04 June 2016 - 03:38 PM

Hello!

As the topic subject asks, "Can a Netduino model 1 power external logic directly?". I've a new design taking shape, and whilst I know that when running a device via USB to program it, the answer would be "No.",but what happens afterwards?


This would be ordinary TTL stuff, circa 1980.


Incidentally I've successfully mounted it inside a "Project Enclosure kit" from Radio Shack. Plus a prototyping shield as designed by Makershed. 


Driving relay coils using a Netduino

27 April 2016 - 01:32 PM

Hello!

New project time here. Right now I have running a Netduino using an edited form of one of my PAL driver programs to talk to an SN7437 wired to send the output of the first gate to go to the second's first input. There's also a red LED attached to first's output. The one for second is connected to a SSR who's activating the 24V coil in the counter.

Here's my code:

using System;
using System.Threading;
using Microsoft.SPOT;
using Microsoft.SPOT.Hardware;
using SecretLabs.NETMF.Hardware;
using SecretLabs.NETMF.Hardware.Netduino;

namespace palout4
{
    public class Program
    {
        public static void Main()
        {
            // write your code here
            OutputPort i0 = new OutputPort(Pins.GPIO_PIN_D2, false);
         //   OutputPort i1 = new OutputPort(Pins.GPIO_PIN_D3, false);
         //   OutputPort i2 = new OutputPort(Pins.GPIO_PIN_D4, false);
         //   OutputPort i3 = new OutputPort(Pins.GPIO_PIN_D5, false);
         //   OutputPort i4 = new OutputPort(Pins.GPIO_PIN_D6, false);
         //   OutputPort i5 = new OutputPort(Pins.GPIO_PIN_D7, false);
         //   OutputPort i6 = new OutputPort(Pins.GPIO_PIN_D8, false);
         //   OutputPort i7 = new OutputPort(Pins.GPIO_PIN_D9, false);
          //  OutputPort i8 = new OutputPort(Pins.GPIO_PIN_D10, false);
         //   OutputPort i9 = new OutputPort(Pins.GPIO_PIN_D11, false);
         //   OutputPort i10 = new OutputPort(Pins.GPIO_PIN_D12, false);
         //   OutputPort i11 = new OutputPort(Pins.GPIO_PIN_D13, false);
            while (true)
            {
                i0.Write(true);
             //   i1.Write(true);
             //   i2.Write(true);
             //   i3.Write(true);  
             //   i4.Write(true);  
             //   i5.Write(true);  
             //   i6.Write(true);  
             //   i7.Write(true);  
              //  i8.Write(true);  
         //       i9.Write(true);
                Thread.Sleep(1500);
                i0.Write(false);
            //    i1.Write(false);
            //    i2.Write(false);
            //    i3.Write(false); 
            //    i4.Write(false);
            //    i5.Write(false);
            //    i6.Write(false); 
            //    i7.Write(false); 
          //      i8.Write(false);
          //      i9.Write(false);
             Thread.Sleep(1500);
                i0.Write(true);
              //  i1.Write(true);
              //  i2.Write(true);
              //  i3.Write(false);  
              //  i4.Write(false);
              //  i5.Write(false); 
              //  i6.Write(false); 
              //  i7.Write(false); 
         //       i8.Write(true);
         //       i9.Write(true);
              Thread.Sleep(1500);
                i0.Write(true);
          //      i1.Write(true);
          //      i2.Write(true);
          //      i3.Write(false); 
          //      i4.Write(false); 
          //      i5.Write(false); 
          //      i6.Write(false); 
          //      i7.Write(false); 
         //       i8.Write(true); 
         //       i9.Write(true);
         //       i8.Write(false);
         //       i9.Write(false);
             Thread.Sleep(1500);
                i0.Write(false);
         //       i1.Write(false);
         //       i2.Write(false);
         //       i3.Write(false);
           //     i4.Write(false);
          //      i5.Write(false);
          //      i6.Write(false);
          //      i7.Write(false);
          //      i8.Write(false);
          //      i9.Write(false);
             Thread.Sleep(1500);
               i0.Write(true);
           //    i1.Write(true);
           //    i2.Write(true);
           //    i3.Write(false); 
           //    i4.Write(false); 
           //    i5.Write(false); 
           //    i6.Write(false);
           //    i7.Write(false); 
         //       i8.Write(true);
         //       i9.Write(true);
             Thread.Sleep(1500);
                  i0.Write(false); 
         //       i1.Write(false);
         //       i2.Write(false);
         //       i3.Write(true);
         //       i4.Write(true); 
         //       i5.Write(true);
         //       i6.Write(false);
         //       i7.Write(false);
         //       i8.Write(false);
         //       i9.Write(false);
              Thread.Sleep(800);
              
            }
        }
    }
}

I'm keeping the format that I found worked for the earlier efforts, however it's the driving circuits that I'm stuck on. That one I described is the first one I tried. So naturally it worked.


Oddly enough the circuit refused to work with a Basic Stamp2 device.


Forum was away from home for a while-- what happened?

26 December 2015 - 06:48 AM

Hello!

The forum was AWOL for a while over the past several days. All I saw was a driver error.


So what happened? On the contact page it simply shows the Forum. It does not list alternate forms of contact.


Variations on a theme of ButtonApp (Mini)

26 December 2015 - 06:41 AM

Hello!

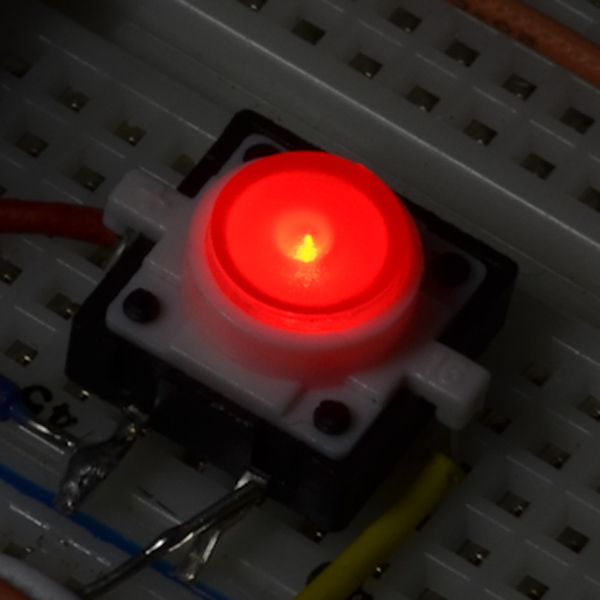
After being away from the Netduino world for far too long, I decided to take a try and apply something I bought from Sparkfun earlier this month, It's their illuminated button.


See here:

10442-03.jpg


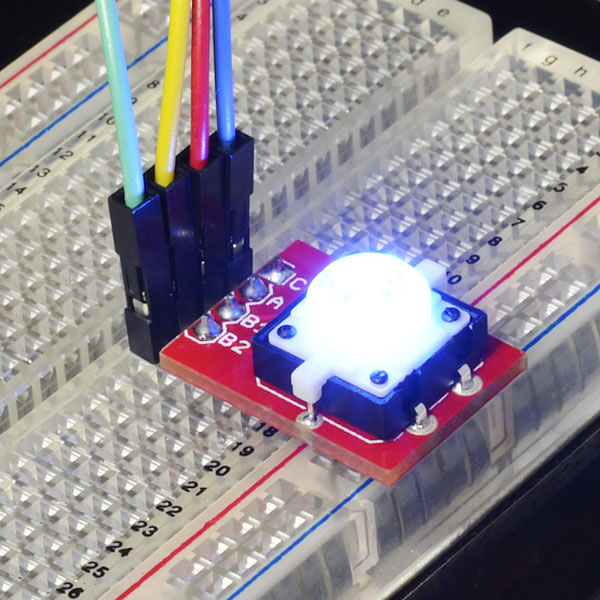
I have it mounted on their breakout board:

10467-04.jpg


It's the white one shown, but I picked Red since its almost always that color when we build ours on breadboards with the Netduino Mini involved.


And the code? I'm glad someone ask:

using System;
using System.Threading;
using Microsoft.SPOT;
using Microsoft.SPOT.Hardware;
using SecretLabs.NETMF.Hardware;
using SecretLabs.NETMF.Hardware.NetduinoMini;

/* NOTE: make sure you change the deployment target from the Emulator to your Netduino before running this
 * Netduino sample app.  To do this, select "Project menu > ButtonApp Properties > .NET Micro Framework" and 
 * then change the Transport type to USB (or Serial).
 * Finally, close the ButtonApp properties tab to save these settings. */

namespace ButtonApp
{
    public class Program
    {
        public static void Main()
        {
            // write your code here
           
            OutputPort led = new OutputPort(Pins.GPIO_PIN_17, false);
            Thread.Sleep(350);
            InputPort button = new InputPort(Pins.GPIO_PIN_16, false, Port.ResistorMode.Disabled);
            bool buttonState = false;
            Thread.Sleep(350);
            while (true)
            {
                buttonState = button.Read();
                led.Write(!buttonState);
            }          
        }

    }
}

For those us who are really curious, I stuck one of my trustworthy SN7437 parts in between the two ports chosen.


After the usual fiddling with the FTDI device to talk to the device, it worked and the code deployed as if its been run there before. 


home    hardware    projects    downloads    community    where to buy    contact Copyright © 2016 Wilderness Labs Inc.  |  Legal   |   CC BY-SA
This webpage is licensed under a Creative Commons Attribution-ShareAlike License.