Netduino home hardware projects downloads community

Jump to content


The Netduino forums have been replaced by new forums at community.wildernesslabs.co. This site has been preserved for archival purposes only and the ability to make new accounts or posts has been turned off.

nickatredbox

Member Since 14 Feb 2012
Offline Last Active Apr 08 2013 07:03 PM
-----

Topics I've Started

A Tiny TinyCLR web server

25 March 2013 - 12:54 AM

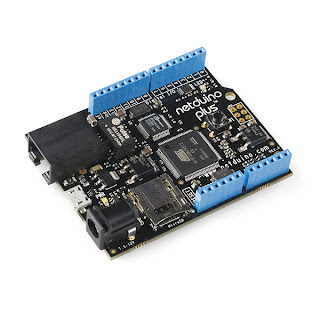
A variation on a simple web server I found on line. A friend of mine wanted a simple demo as a start point for a .NET WWW project


You can bridge www to serial, flash the led, set digital outputs and set 4 servo positions


[color=rgb(0,0,0);font-family:monospace;font-size:13px;]This is a wee web server which allows reading and writing to Netduino hardware[/color]

[color=rgb(0,0,0);font-family:monospace;font-size:13px;]there is an index page[/color]

[color=rgb(0,0,0);font-family:monospace;font-size:13px;]http://ipaddress/index.htm[/color]


[color=rgb(0,0,0);font-family:monospace;font-size:13px;]COMMANDS[/color]

[color=rgb(0,0,0);font-family:monospace;font-size:13px;]http://ipaddress/?led=0[/color]
[color=rgb(0,0,0);font-family:monospace;font-size:13px;]http://ipaddress/?led=1[/color]

[color=rgb(0,0,0);font-family:monospace;font-size:13px;]Digital outputs on and off dout is the output number 0 to 3 state is 0 or 1 pind 0,1,2,3[/color]
[color=rgb(0,0,0);font-family:monospace;font-size:13px;]http://ipaddress/?dout=0&state=1[/color]
[color=rgb(0,0,0);font-family:monospace;font-size:13px;]http://ipaddress/?dout=0&state=0[/color]

[color=rgb(0,0,0);font-family:monospace;font-size:13px;]read 4 analogue inputs[/color]
[color=rgb(0,0,0);font-family:monospace;font-size:13px;]http://ipaddress/?anin[/color]


[color=rgb(0,0,0);font-family:monospace;font-size:13px;]set 4 PWM outputs pins 5,6,8,9[/color]
[color=rgb(0,0,0);font-family:monospace;font-size:13px;]http://ipaddress/?pwm=0&pos=1750[/color]


[color=rgb(0,0,0);font-family:monospace;font-size:13px;]Send serial data where werty is the string that is sent[/color]
[color=rgb(0,0,0);font-family:monospace;font-size:13px;]http://ipaddress/?serial=qwery[/color]

[color=rgb(0,0,0);font-family:monospace;font-size:13px;]COSM data[/color]
[color=rgb(0,0,0);font-family:monospace;font-size:13px;]https://cosm.com/users/nickatrdbox#[/color]


Source code

https://docs.google....dit?usp=sharing


Kalman filter for TinyCLR

02 January 2013 - 02:06 AM

Always wanted one of these for my Yellow Plane


A peice of C# converted from Arduino C original author Kristian Lauszus, TKJ Electronics here is my wee test harness for same.


Here is the test harness the whole project is attached in a zip along with the two classes if that all you need 


Posted Image


See Kalman filter


/* Copyright (C) 2012 Kristian Lauszus, TKJ Electronics. All rights reserved.This software may be distributed and modified under the terms of the GNUGeneral Public License version 2 (GPL2) as published by the Free SoftwareFoundation and appearing in the file GPL2.TXT included in the packaging ofthis file. Please note that GPL2 Section 2[b] requires that all works basedon this software must also be made publicly available under the terms ofthe GPL2 ("Copyleft").Contact information-------------------Kristian Lauszus, TKJ ElectronicsWeb : http://www.tkjelectronics.come-mail : kristianl@tkjelectronics.com*/using System;using System.Collections.Generic;using System.Linq;using System.Text;namespace KalmanTest{public class Kalman{/* variables */double Q_angle; // Process noise variance for the accelerometerdouble Q_bias; // Process noise variance for the gyro biasdouble R_measure; // Measurement noise variance - this is actually the variance of the measurement noisedouble angle; // The angle calculated by the Kalman filter - part of the 2x1 state matrixdouble bias; // The gyro bias calculated by the Kalman filter - part of the 2x1 state matrixdouble rate; // Unbiased rate calculated from the rate and the calculated bias - you have to call getAngle to update the ratedouble[,] P = new double[2,2]; // Error covariance matrix - This is a 2x2 matrixdouble[] K = new double[2]; // Kalman gain - This is a 2x1 matrixdouble y; // Angle difference - 1x1 matrixdouble S; // Estimate error - 1x1 matrixpublic Kalman() {/* We will set the varibles like so, these can also be tuned by the user */Reset();// Reset bias// Since we assume tha the bias is 0 and we know the starting angle (use setAngle),//the error covariance matrix is set like so - see: http://en.wikipedia.org/wiki/Kalman_filter#Example_application.2C_technicalSetDefaults();}// The angle should be in degrees and the rate should be in degrees per second and the delta time in secondspublic double getAngle(double newAngle, double newRate, double dt) {// KasBot V2 - Kalman filter module - http://www.x-firm.com/?page_id=145// Modified by Kristian Lauszus// See my blog post for more information: http://blog.tkjelectronics.dk/2012/09/a-practical-approach-to-kalman-filter-and-how-to-implement-it// Discrete Kalman filter time update equations - Time Update ("Predict")// Update xhat - Project the state ahead/* Step 1 */rate = newRate - bias;angle += dt * rate;// Update estimation error covariance - Project the error covariance ahead/* Step 2 */P[0,0] += dt * (dt*P[1,1] - P[0,1] - P[1,0] + Q_angle);P[0,1] -= dt * P[1,1];P[1,0] -= dt * P[1,1];P[1,1] += Q_bias * dt;// Discrete Kalman filter measurement update equations - Measurement Update ("Correct")// Calculate Kalman gain - Compute the Kalman gain/* Step 4 */S = P[0,0] + R_measure;/* Step 5 */K[0] = P[0,0] / S;K[1] = P[1,0] / S;// Calculate angle and bias - Update estimate with measurement zk (newAngle)/* Step 3 */y = newAngle - angle;/* Step 6 */angle += K[0] * y;bias += K[1] * y;// Calculate estimation error covariance - Update the error covariance/* Step 7 */P[0,0] -= K[0] * P[0,0];P[0,1] -= K[0] * P[0,1];P[1,0] -= K[1] * P[0,0];P[1,1] -= K[1] * P[0,1];return angle;}public void setAngle(double newAngle) { angle = newAngle; } // Used to set angle, this should be set as the starting anglepublic double getRate() { return rate; } // Return the unbiased rate/* These are used to tune the Kalman filter */public void setQangle(double newQ_angle) { Q_angle = newQ_angle; }public double getQangle() { return Q_angle; }public void setQbias(double newQ_bias) { Q_bias = newQ_bias; }public double getQbias() { return Q_bias; }public void setRmeasure(double newR_measure) { R_measure = newR_measure; }public double getRmeasure() { return R_measure; }public void Reset(){bias = 0; // Reset biasP[0, 0] = 0; // Since we assume tha the bias is 0 and we know the starting angle (use setAngle), the error covariance matrix is set like so - see: http://en.wikipedia.org/wiki/Kalman_filter#Example_application.2C_technicalP[0, 1] = 0;P[1, 0] = 0;P[1, 1] = 0;}public void SetDefaults(){/* We will set the varibles like so, these can also be tuned by the user */Q_angle = 0.001;Q_bias = 0.003;R_measure = 0.03;}}//End of class}


Netduino plus pushing data via cosm.com

26 November 2012 - 12:15 PM

The project

I want to share data from various RC models via the www using an Xbee for telemetery

Posted Image

http://www.youtube.com/watch?v=-LRjqKqUy8s&hd=1

The hardware

Posted Image

Vonets VAP11G Wifi Bridge
The new addition of a USB wire is to connect a computer (desktop, laptop)for power, No need extra power adapter. It can be used for any wireless network product, such as wireless router, IP camera Support any VoIP ATAs and VoIP Phones;
Posted Image


Simple C# Example

using System;
using System.Net;
using System.Net.Sockets;
using System.Threading;
using Microsoft.SPOT;
using Microsoft.SPOT.Hardware;
using SecretLabs.NETMF.Hardware;
using SecretLabs.NETMF.Hardware.NetduinoPlus;
using System.Text;

namespace NetduinoPlusCOSM_DAS
{
public class Program
{
const string APIKEY = "XXXXXXXXXXXXXXXXXXXXXXXXXXXXX"; // your cosm api key
const int FEEDID = 88466; // your feed ID
const string USERAGENT = "Cosm Arduino Example (88466)"; // user agent is the project name

// if you don't want to use DNS (and reduce your sketch size)
// use the numeric IP instead of the name for the server:
static IPAddress remote_IP = IPAddress.Parse("173.203.98.29"); // numeric IP for api.cosm.com
//char server[] = "api.cosm.com"; // name address for cosm API

static AnalogInput anin_0 = new AnalogInput(Pins.GPIO_PIN_A0);
static AnalogInput anin_1 = new AnalogInput(Pins.GPIO_PIN_A1);
static AnalogInput anin_2 = new AnalogInput(Pins.GPIO_PIN_A2);
static AnalogInput anin_3 = new AnalogInput(Pins.GPIO_PIN_A3);

static Socket serversocket = null;

public static void Main()
{
// write your code here


IPEndPoint remoteEndPoint = new IPEndPoint(remote_IP, 80);

//IPHostEntry entry = Dns.GetHostEntry("173.203.98.29");
//IPAddress address = entry.AddressList[0];
//IPEndPoint remoteEndPoint = new IPEndPoint(address, 80);


while (true)
{

int an_0 = anin_0.Read();
int an_1 = anin_1.Read();
int an_2 = anin_2.Read();
int an_3 = anin_3.Read();

serversocket = new Socket(AddressFamily.InterNetwork, SocketType.Stream, ProtocolType.Tcp);

serversocket.Connect(remoteEndPoint);

string CSVdata = "anin_0," + an_0.ToString() + "\r\nanin_1," + an_1.ToString() + "\r\nanin_2," + an_2.ToString() + "\r\nanin_3," + an_3.ToString();

// calculate the length of the sensor reading in bytes:
// 8 bytes for "sensor1," + number of digits of the data:
int ContentLength = 8 + CSVdata.Length;

string WholePacket = "";

// send the HTTP PUT request:
WholePacket += "PUT /v2/feeds/" + FEEDID.ToString() + ".csv HTTP/1.1\r\n";
WholePacket += "Host: api.cosm.com" + "\r\n";
WholePacket += "X-ApiKey: " + APIKEY + "\r\n";
WholePacket += "User-Agent: " + USERAGENT + "\r\n";

ContentLength = 8 + an_0.ToString().Length + an_1.ToString().Length;

WholePacket += "Content-Length: " + ContentLength.ToString() + "\r\n";

// last pieces of the HTTP PUT request:
WholePacket += "Content-Type: text/csv" + "\r\n";
WholePacket += "Connection: close" + "\r\n";
WholePacket += "\r\n";

// here's the actual content of the PUT request:
WholePacket += "anin_0," + an_0.ToString() + "\r\n";
WholePacket += "anin_1," + an_1.ToString() + "\r\n";

byte[] buffer = Encoding.UTF8.GetBytes(WholePacket);

serversocket.Send(buffer);

bool poll = serversocket.Poll(1000000, SelectMode.SelectRead);

if (serversocket.Available > 0)
{
buffer = new byte[serversocket.Available];

serversocket.Receive(buffer);

string resp = new string(Encoding.UTF8.GetChars(buffer));

Debug.Print(resp);

}

serversocket.Close();

Thread.Sleep(5000);

}

}

}
}

Another model
http://www.youtube.com/watch?feature=player_embedded&v=3_E9UTif-TI

Noisy Netduino Plus Analogue inputs

04 July 2012 - 08:00 AM

Hello,

Is any one else out there seeing 10 to 15 counts of noise on analog input signals from the ND + ?

My setup is as follows I have a ND+ talking to a Fez Panda II via serial (See code below) The input is a 10K pot wired

between 5v and ground with wiper connected to the analogue input. While writing it occurs to me it could be digital noise on the 5V rail due to comms and other activity.

Any thoughts people?

Please see My Blog fro more background infomation


private void MasterUpdate()
        {
            do
            {

                try
                {
                    lock (s_Mutex)
                    {

#if DEBUG
                        Debug.Print(SERVERstring);
#endif

                        int pot = Analog.ReadAnIn(Analog.AN_IN.Pot_1) / 2;

                        string[] splitted = SERVERstring.Split(',');

                        splitted[16] = pot.ToString();

                        int pl = splitted.Length;

                        byte[] MasterBytes = new byte[pl * 2];

                        int j = 0;
                        for(int i = 0;i < pl;i++)
                        {
                            int ival = int.Parse(splitted[i]);

                            MasterBytes[j] = (byte)(ival & 0x00FF);
                            MasterBytes[j + 1] = (byte)((ival & 0xFF00) >> 8);

                            j += 2;
                        }

home    hardware    projects    downloads    community    where to buy    contact Copyright © 2016 Wilderness Labs Inc.  |  Legal   |   CC BY-SA
This webpage is licensed under a Creative Commons Attribution-ShareAlike License.