Netduino home hardware projects downloads community

Jump to content


The Netduino forums have been replaced by new forums at community.wildernesslabs.co. This site has been preserved for archival purposes only and the ability to make new accounts or posts has been turned off.

sebswed

Member Since 30 Mar 2013
Offline Last Active Private
-----

Topics I've Started

DDNS how to?

15 April 2013 - 07:27 PM

Hi there.


Could someone explain what to do? I thought I understood this concept but it doesn't work so I guess I missed something.


I have a D-Link modem/router (DSL-2740B) and with that you are allowed to create one free DDNS at https://www.dlinkddns.com/login so I created a host name, lets call it hostname.dlinkddns.com , used the IP address that was showing and saved the settings.


I specified this hostname.dlinkddns.com also in my router (ipoe_atm0/atm0) and added a port forward with,
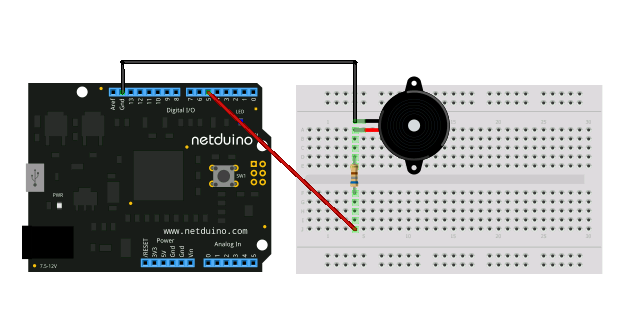
 

Name: Netduino

Address: 192.168.1.2

External port: 80

Internal port: 80

Protocol: TCP

Wan Interface: atm0


If I type 192.168.1.2 in my browser I get the Netduino webserver (on my local network)

If I type hostname.dlinkddns.com I get to see my routers login page (on my local network)


Outside my local network I do not get a result on hostname.dlinkddns.com


I read on the D-Link forum that some firmware versions do not allow passwords longer than 10 digits (I used 9)

I even deleted the host, reset the modem to factory default and tried again. No result.


The funny thing is, it used to work with an Arduino, so  know its possible. I just cant remember how I did it the first time


Should I use a different port (8080) ?


In my code I use: socket.Bind(new IPEndPoint(IPAddress.Any, 80));


Is there something obvious missing?

Any advise is welcome.


Web server up and running - not all html text showing

14 April 2013 - 03:20 PM

Hi there.


I'm very proud that I got a web server up and running  :) However, not all text is showing on the html page and I cant figure out why that is. Its like it hangs while loading the page. Does that make sense?


The code I use is copy and paste stuff from other forum members (its the best way for me to learn how it works).


The code I have now and which produces a partial html page is below and I attach a screenshot of the html page.


All help is appreciated :)

using System;using Microsoft.SPOT;using System.Net.Sockets;using System.Net;using System.Threading;using System.Text;using Microsoft.SPOT.Hardware;using SecretLabs.NETMF.Hardware.NetduinoPlus;namespace WebserverHelloWorld{    public class WebServer : IDisposable    {        private OutputPort dout_0 = new OutputPort(Pins.GPIO_PIN_D2, false);        private OutputPort dout_1 = new OutputPort(Pins.GPIO_PIN_D3, false);        private OutputPort dout_2 = new OutputPort(Pins.GPIO_PIN_D12, false);        private OutputPort dout_3 = new OutputPort(Pins.GPIO_PIN_D13, false);                private Socket socket = null;           public WebServer()        {            //Initialize Socket class            socket = new Socket(AddressFamily.InterNetwork, SocketType.Stream, ProtocolType.Tcp);            //Request and bind to an IP from DHCP server            socket.Bind(new IPEndPoint(IPAddress.Any, 80));            //Debug print our IP address            Debug.Print(Microsoft.SPOT.Net.NetworkInformation.NetworkInterface.GetAllNetworkInterfaces()[0].IPAddress);            //Start listen for web requests            socket.Listen(10);            ListenForRequest();        }        public void ListenForRequest()        {            while (true)            {                using (Socket clientSocket = socket.Accept())                {                    //Get clients IP                    IPEndPoint clientIP = clientSocket.RemoteEndPoint as IPEndPoint;                    EndPoint clientEndPoint = clientSocket.RemoteEndPoint;                    //int byteCount = cSocket.Available;                    int bytesReceived = clientSocket.Available;                    if (bytesReceived > 0)                    {                        //Get request                        byte[] buffer = new byte[bytesReceived];                        int byteCount = clientSocket.Receive(buffer, bytesReceived, SocketFlags.None);                        string request = new string(Encoding.UTF8.GetChars(buffer));                        Debug.Print(request);                        //Compose a response                        string response = "Hello World";                        string header = "HTTP/1.0 200 OKrnContent-Type: text; charset=utf-8rnContent-Length: " + response.Length.ToString() + "rnConnection: closernrn";                                                // New test 2013-04-14                        bool vdout_0 = dout_0.Read();                        bool vdout_1 = dout_1.Read();                        bool vdout_2 = dout_2.Read();                        bool vdout_3 = dout_3.Read();                                                //Make some html                        response = "<!DOCTYPE html>";                        response += "<html>";                        response += "<head>";		                        response += "<title>Netduino Plus</title>";                        response += "</head>";                        response += "<body>";                        response += "<h1>Netduino Plus</h1>";                        response += "Out 1 = " + vdout_1.ToString() + "<br/>";                        response += "Out 2 = " + vdout_2.ToString() + "<br/>";                        response += "Out 3 = " + vdout_3.ToString() + "<br/>";                                                response += "</body>";                        response += "</html>";                        // End test 2013-04-14                                                clientSocket.Send(Encoding.UTF8.GetBytes(header), header.Length, SocketFlags.None);                        clientSocket.Send(Encoding.UTF8.GetBytes(response), response.Length, SocketFlags.None);                                            }                }            }        }        #region IDisposable Members        ~WebServer()        {            Dispose();        }        public void Dispose()        {            if (socket != null)                socket.Close();        }        #endregion    }}

Attached File  Clipboard01.jpg   60.88KB   28 downloads


Simpel timer for security system

13 April 2013 - 06:26 PM

Netduino (plus) 2 project


I'm a beginner, just started coding and was playing with loops, button, LED and piezo element. I created this to understand the code and provide this for beginners like me who have some kind of security system in mind.


It uses the on board LED and button with a piezo element connected on pin 5 (red = +) and GRND (-).

It requires for you to add the PWM.dll to your project reference (right-click on your folder called 'References' and choose 'Add Reference...'). It can be used in combination with a 10K resistor to reduce the volume (I did not use a resistor).


When pressing the button a low frequency sound followed by a higher frequency sound will be heard. The later is looped (counted) and creates the (activation) delay. After the delay (10 loops) the on board LED will go on, indicating the system is activated. You could write additional code there where the LED goes on (for example an output port that enables a relay allowing power to an external siren when a sensor detects an intruder.


You could use an RFID card reader, code- or key lock instead of the on board button.


Its a simple code, just copy and paste and make sure to add the pwm.dll reference to your project.

Posted Image


using System;using System.Net;using System.Net.Sockets;using System.Threading;using Microsoft.SPOT;using Microsoft.SPOT.Hardware;using SecretLabs.NETMF.Hardware;using SecretLabs.NETMF.Hardware.Netduino;namespace NetduinoApplication1{    public class Program{        static SecretLabs.NETMF.Hardware.PWM speaker = new SecretLabs.NETMF.Hardware.PWM(Pins.GPIO_PIN_D5); // Define the speaker    static OutputPort led = new OutputPort(Pins.ONBOARD_LED, false); // Define the LED    static InputPort button1 = new InputPort(Pins.ONBOARD_BTN, false, Port.ResistorMode.Disabled); // Define the button    public static void Main()    {        while (true)        {            if (button1.Read())   //Check if the button is pressed and do the following when pressed            {                                //Period is 1/frequency                //1/1,000,000 second : 1000000 --> 1 sec                // Duration for Sound over PWM (Period / 2)                uint C = 1000000 / 600; //600 Hz tone                uint D = 1000000 / 660; //660 Hz tone                speaker.SetPulse(C, C / 2);  //Play                Thread.Sleep(800); // Duration                speaker.SetPulse(0, 0); // Turn Off                Thread.Sleep(75); //Pause                    int MyVar; // Create variable "MyVar"                    MyVar = 0; // MyVar is 0                    while (MyVar < 10) // While MyVar is less than 10, do the following loop                    { // start the counting loop for MyVar                        MyVar++; // Increase the value from MyVar by + 1                        speaker.SetPulse(D, D / 2);  //Play                        led.Write(true); //LED on                        Thread.Sleep(1500); // Duration                        speaker.SetPulse(0, 0); // Turn Off                        led.Write(false); // LED off                        Thread.Sleep(2000); //Pause                    } // Close the counting loop from MyVar                              // Write your code here                // This code will run directly after the MyVar loop (for example to enable your security system)                led.Write(true); //LED on                        } // Close the button loop            // Write your code here            // Here you can write other code that has to run even if the button not has been pressed            // For example a listener for a button to deactivate your security system        } // Close the while loop    } // Close the Main loop}}


home    hardware    projects    downloads    community    where to buy    contact Copyright © 2016 Wilderness Labs Inc.  |  Legal   |   CC BY-SA
This webpage is licensed under a Creative Commons Attribution-ShareAlike License.