The Netduino forums have been replaced by new forums at community.wildernesslabs.co.
This site has been preserved for archival purposes only
and the ability to make new accounts or posts has been turned off.
I don't seem to be able to find out where I have to change some speed setting or so to make sure the DHT11 is correctly read. Also this issue with unpluging the one wire. Did anybod get that out of the way.
I am not using the Firmware 4.3 yet but just wanted to make sure you are connecting D0 and D1 to the same wire that goes to the DATA signal (Pin 2) in the RHT03. Also, are you powering with 3.3V or 5V?
I am not using the Firmware 4.3 yet but just wanted to make sure you are connecting D0 and D1 to the same wire that goes to the DATA signal (Pin 2) in the RHT03. Also, are you powering with 3.3V or 5V?
Hi Giuliano,
Yes my wiring is correct, I can get valid data but only after unplugging/plugging the wire.
I tried with both 3.3 and 5V, the result is the same.
Leif and Laurelle have the same problem, that would be great if they could confirm which firmware they are using.
Based on the info provided all I can say that it maybe related to the new Firmware 4.3 but I have to try it out.
Is there any way for you guys to flash the N+2 with 4.2 and give it a shot?
Giuliano
Hi Giuliano,
I installed Visual Studio 2012 on another machine with SDK 4.2 and downgraded my N+2 to Firmware 4.2.2
I downloaded your source code (Feb. 20th), deployed and ran it but unfortunately I still have the same problem.
The sensor returns correct values only after unplugging/plugging PIN 0 (or other wires). I tried with 3.3 and 5V.
The problem is not extremely important when we know the manual "workaround" but I am having other weird problems with some other sensors and the problem might be the same as this one.
I managed to fix the consistent failures of CheckPins() as follows:
        private bool CheckPins()
        {
            Microsoft.SPOT.Debug.Assert(portIn != null, "ERROR: DHT Input port should not be null.");
            Microsoft.SPOT.Debug.Assert(portOut != null, "ERROR: DHT Output port should not be null.");
            Microsoft.SPOT.Debug.Assert(!portOut.Active, "ERROR: DHT Output port should not be active.");

            bool expectedTrue = portIn.Read();
            portOut.Active = true;  // Switch to output
            //portOut.Write(false); // already had false latched in
            bool expectedFalse = portIn.Read();
            portOut.Active = false; // Switch to input
            //bool expectedTrue = portIn.Read(); // BUGBUG: for some reason this is always reading false even w/ delay inserted before;
                                                 // so I moved it to be read bofore outputting a low by activating the o/p pin
            return (expectedTrue && !expectedFalse);
        }
behavior with my DHT22 and a Netduino Plus 2 until I disconnected and reconnected a pin. Then I tried Fred Werneck's previous suggestion and changed DhtSensor.cs's Read() function to this:
        public bool Read()
        {
            if (disposed)
            {
                throw new ObjectDisposedException();
            }
            // The 'bitMask' also serves as edge counter: data bit edges plus
            // extra ones at the beginning of the communication (presence pulse).
            bitMask = 1L << 41;

            data = 0;
            // lastTicks = 0; // This is not really needed, we measure duration
            // between edges and the first three values are ignored anyway.

            // Initiate communication
            portOut.Active = true;
            portOut.Write(false);       // Pull bus low
            Thread.Sleep(StartDelay);
            portIn.EnableInterrupt();   // Turn on the receiver
            portOut.Active = false;     // Release bus

            bool dataValid = false;

            // Now the interrupt handler is getting called on each falling edge.
            // The communication takes up to 5 ms, but the interrupt handler managed
            // code takes longer to execute than is the duration of sensor pulse
            // (interrupts are queued), so we must wait for the last one to finish
            // and signal completion. 20 ms should be enough, 50 ms is safe.
            if (dataReceived.WaitOne(50, false))
            {
                // TODO: Use two short-s ?
                bytes[0] = (byte)((data >> 32) & 0xFF);
                bytes[1] = (byte)((data >> 24) & 0xFF);
                bytes[2] = (byte)((data >> 16) & 0xFF);
                bytes[3] = (byte)((data >> 8) & 0xFF);

                byte checksum = (byte)(bytes[0] + bytes[1] + bytes[2] + bytes[3]);
                if (checksum == (byte)(data & 0xFF))
                {
                    dataValid = true;
                    if (bytes[0] == 0)
                    {
                        portIn.DisableInterrupt();
                    }
                    else
                    {
                        Convert(bytes);
                    }
                }
                else
                {
                    Debug.Print("DHT sensor data has invalid checksum.");
                }
            }
            else
            {
                portIn.DisableInterrupt();  // Stop receiver
                Debug.Print("DHT sensor data timeout.");  // TODO: TimeoutException?
            }
            return dataValid;
        }
A timeout, one bad read, and then good ones from that point forward. I'm sure with a bit of work we could eliminate that first bad read as well, I haven't tried yet.
To save someone else time, I'm attaching my working project. I'm targeting the 4.3 framework successfully in it.
To get this working with a DHT11 sensor you just need to update/replace RHT03.cs with the following. I've added a DHT11 class that doesn't do any of the calculations that are required for the DHT22. Obviously you need to change the declaration of the sensor to dht11sensor too
using System;
using Microsoft.SPOT;
using Microsoft.SPOT.Hardware;
using CW.NETMF;
using CW.NETMF.Sensors;

namespace NetduinoPlus2RHT03
{
    /// <summary>
    /// Represents an instance of the DHT22 sensor.
    /// </summary>
    /// <remarks>
    /// Humidity measurement range 0 - 100%, accuracy ±2-5%.
    /// Temperature measurement range -40 - 80°C, accuracy ±0.5°C.
    /// </remarks>
    public class Dht22Sensor : DhtSensor
    {
        /// <summary>
        /// Initialize a new instance of the <see cref="Dht22Sensor"/> class.
        /// </summary>
        /// <param name="pin1">The identifier for the sensor's data bus port.</param>
        /// <param name="pin2">The identifier for the sensor's data bus port.</param>
        /// <param name="pullUp">The pull-up resistor type.</param>
        /// <remarks>
        /// The ports identified by <paramref name="pin1"/> and <paramref name="pin2"/>
        /// must be wired together.
        /// </remarks>
        public Dht22Sensor(Cpu.Pin pin1, Cpu.Pin pin2, PullUpResistor pullUp)
            : base(pin1, pin2, pullUp)
        {
            // This constructor is intentionally left blank.
        }

        protected override int StartDelay
        {
            get
            {
                return 2; // At least 1 ms
            }
        }

        protected override void Convert(byte[] data)
        {
            Debug.Assert(data != null);
            Debug.Assert(data.Length == 4);

            //DHT22 Code
            // The first byte is integral, the second decimal part
            //Humidity = ((data[0] << 8) | data[1]) * 0.1F;

            //DHT11 Code
            Humidity = data[0];

            // DHT22 code
            //var temp = (((data[2] & 0x7F) << 8) | data[3]) * 0.1F;
            //Temperature = (data[2] & 0x80) == 0 ? temp : -temp; // MSB = 1 means negative

            // DHT11 Code
            Temperature = data[2];
        }
    }
    public class Dht11Sensor : DhtSensor
    {
        /// <summary>
        /// Initialize a new instance of the <see cref="Dht11Sensor"/> class.
        /// </summary>
        /// <param name="pin1">The identifier for the sensor's data bus port.</param>
        /// <param name="pin2">The identifier for the sensor's data bus port.</param>
        /// <param name="pullUp">The pull-up resistor type.</param>
        /// <remarks>
        /// The ports identified by <paramref name="pin1"/> and <paramref name="pin2"/>
        /// must be wired together.
        /// </remarks>
        public Dht11Sensor(Cpu.Pin pin1, Cpu.Pin pin2, PullUpResistor pullUp)
            : base(pin1, pin2, pullUp)
        {
            // This constructor is intentionally left blank.
        }

        protected override int StartDelay
        {
            get
            {
                return 2; // At least 1 ms
            }
        }

        protected override void Convert(byte[] data)
        {
            Debug.Assert(data != null);
            Debug.Assert(data.Length == 4);

            Humidity = data[0];

            Temperature = data[2];
        }
    }
}
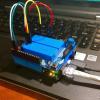
Thanks for posting this, it worked great. I was expecting to spend hours figuring out how to use the DHT11 but had it up and running in about 15 minutes with your code. My refrigerator went out last week and i had an old small fridge in the garage with a bad thermostat. So, what else would a techie do but hook up a DHT11 with the netduino, a switch, relay and presto! A working thermostat for the little fridge. The only changes i made to the code was to add a branch to test the temp and set GPIO_PIN_D7 hi or low to turn on or off the relay. Since timing isn't important in this application I handled false reads by testing for the humidity above 0 along with the lower temp setting since the humidity only reads 0 on a false read. I know, not real elegant but it was quick and easy. Setting the sleep to 15 secs seemed to help also, it lets things settle between readings. "FrankenFridge" has been up and running for 2 days now with no issues, repair man is coming tomorrow to fix the big box. Thanks again, it worked great! IMAG0513.jpg83.96KB3 downloads
Hi stewlf, how is it working with wendo's suggestion? Do you still get timeouts or 32°F/0 humidity values? how often do you read from the sensor?
I am not going to be trying his code any time soon; my relevant Netduino project is installed and functioning adequately, and I'm not inclined to take it apart right now:
the netxt thing that isn´t working on my N+2. I tried several modifications (and of course the original code). I get always "DHT sensor data timeout." After so much trouble getting my GPS module up and running on the N+2 and getting a file written on a SD card I´m about giving up the Netduino. Maybe I´m just too stupid... but I´m working as a SW developer for years now and never had such trouble with other solutions.
Sorry, but this is very(!) unsatisfying. Looks like I should switch back to the good old Arduino. That guy works very robust w/o all this trouble..
I did 2 steps to fix the issue mentioned above: remove the reference to SecretLabs.NETMF.Hardware.Netduino and add another one to SecretLabs.NETMF.Hardware.NetduinoPlus; then make an appropriate change to the "usage" statement in the Program.cs file as below:
using SecretLabs.NETMF.Hardware.NetduinoPlus;
This resolves the problem and all N+2 functionality as well as sensor is working correctly.
I was able to get the code from stewlg and wendo to work with my N2+ and DHT11. First read fails, then all 0s, then appears to work, with a timeout from time to time.
I have doubts about accuracy though. I plugged the very same DHT sensor into my Arduino and I am getting RH:40 and TempF:80.6 while on N2+ I am getting RH:35 and TempF: 77-78. I am not entirely sure which is right. I realize that DHT11 is not the most precise sensor out there.
When playing with these sensors I notice they take quite a while to stabilize after any changes. It may be as simple as moving between 3.3v and 5v VCC and they need some time to settle.
Which is about the same price range. It is more reliable but I have to mention that mine broke in my backyard for being outdoors, I don't think it is designed for outdoors even though I put it underneath something that protects it from sunlight and rain (it doesn't really rain here )
Someone recommended me a good sensor that was very reliable but it was in the order of $30+


 )
)


