The Netduino forums have been replaced by new forums at community.wildernesslabs.co.
This site has been preserved for archival purposes only
and the ability to make new accounts or posts has been turned off.
Now that I've ordered my Netduino Plus 2 I can document what I'm trying to accomplish with it. Special thanks to those who have been hanging out in Chat answering my questions while I decided between this and a full linux based machine to do this.
Purpose of the Project:
To automate the control of my 180 gallon saltwater reef tank. Including monitoring and logging vital stats, controlling the LED lighting I'm building, and controlling various 120v plugs (pumps/etc) and eventually use RF to control a set of EcoTech Vortech pumps. It will log to another server via HTTP posts of various parameters, and will take http posts to control things remotely. Individually it's all been done on either netduino or arduino so it's just a matter of me pulling together the pieces into one project.
I'll need to do several things on a schedule, so I've also ordered an i2c Real time Clock.
EcoTech VorTech Pumps (RF) //eventually.
Based on various parameters, (including time) I will need to make various changes to outlets and PWM channels, and send alerts. The logging and the graphing, visualizations etc is left to the webserver that the system logs to.
Any thoughts or suggestions are more than welcome.
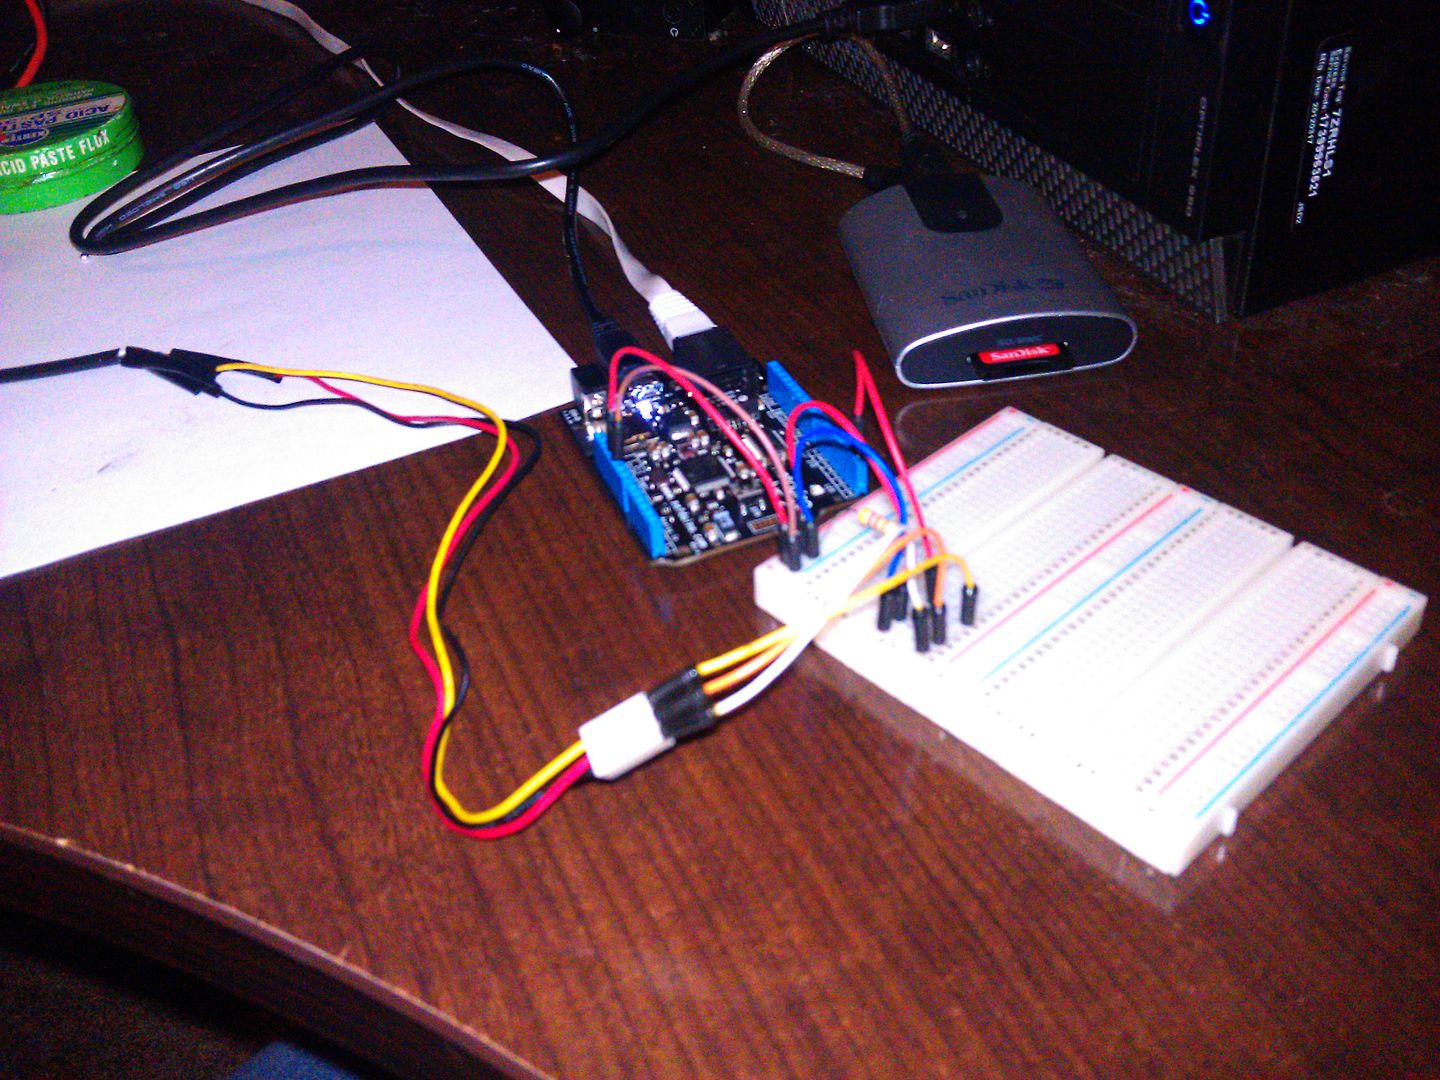
My N+2 will be here Wednesday and by the end of the week I should have the temp sensor, the PWM controller and I ordered up a https://www.sparkfun.../products/10003 beginner kit, since this is my first microcontroller project. Goal is to get a handle on the PWM functionality so when I get my lights built I can test them, and then get some framework stuff done for logging using the temp sensor. After that I'll add the water level sensor. I'm prototyping all of this on my 29gallon biocube that sits on my desk next to me.
So I got my N+2 today. HOLY CRIPES. Way better than I thought! Tiny, as well compared to how it was in my head. Real time debugging + easy to understand tutorials make this a great thing. Only thing is with the N+2 being new I didn't see a lot about how to do networking etc. I haven't updated my firmware yet so I'm seeing an incorrect MAC address which led to some initial confusion (Is the networking working?!) but after I figured out that indeed, it is working... super cool!! I quickly cobbled together a couple lines of code to make a web request and tell me via LED if it was successful:
using System;using System.Threading;using System.Net;using Microsoft.SPOT;using Microsoft.SPOT.Hardware;using SecretLabs.NETMF.Hardware;using SecretLabs.NETMF.Hardware.Netduino;namespace Hello_World{ public class Program { public static void Main() { // write your code here OutputPort led = new OutputPort(Pins.ONBOARD_LED, false); var myReq = (HttpWebRequest)WebRequest.Create("http://chrisuthe.com/robots.txt"); var myResponse =(HttpWebResponse)myReq.GetResponse (); if(myResponse.StatusCode.ToString() == "200") { led.Write(true); } } }}
SUCCESS!!
Now it's back to the 8-5'er for a bit, but I feel good knowing I can upgrade firmware later today and get started planning how the software end will function.
Todays Progress:
Ordered:
1 x LDD-350H
1 x SE-350-48
From Powergate Express LLC
Ordered:
4x LDD-700H
From Mouser (they are basically tripple price vs powergate but in stock)
Power gate won't have 700's in stock until late feb (the 22nd) so I went this route since they got the power supplies in today (Ship monday) and already had the 350's in. Powergate is obviously the price leader here, but they admitted they were having problems keeping the LDD's in stock but did say they had big orders coming in in feb, so I'll wait to buy the rest of my drivers from them.
PCB's Ordered from iMall iteadstudio.com
Haggling in eBay for LED chip currently.
Should have everything to put together a light by the end of the month.
Saw your post. Awsome start. I also have the 29G biocube that I built a controller for (using the original Netduino Plus). It works great, currently runs temp monitor, wave pump control, PH monitor, and has 5 120V switched outlets (I bastardized an undermonitor surge suppressor with relays.) I used the sparkfun RTC for timing.
I just got the new N+ 2 controller last week and will be adapting my code for it. I also designed a fully integrated shield for everything and had the PCB made by Fritzing out of germany (cost $35 and I just had to send the gerber file to them to have it made. Took a month to get it shipped.) major problems I have ran across is electronic noise (my first PCB had no shielding so sensor readings were erratic) also, I had to do multiple samples from PH and temp in order to get accurate readings (just average across multiple samples). also ran into lockup issues because I was running multithreading for everything and the 20x4 LCD didn't like getting messages mixed up.
If you want, my email is jeittreim@hotmail.com we can swap ideas and issues since we are working towards the same end. I am willing to share source wherever it might help. if you want any specific pics or files, let me know.
Glad to have you following along and will certainly be anxious to swap ideas in the near future. I haven't seen any noise problems with my 1wire temp sensor so far, everything has been very stable but that's only with 1 sensor
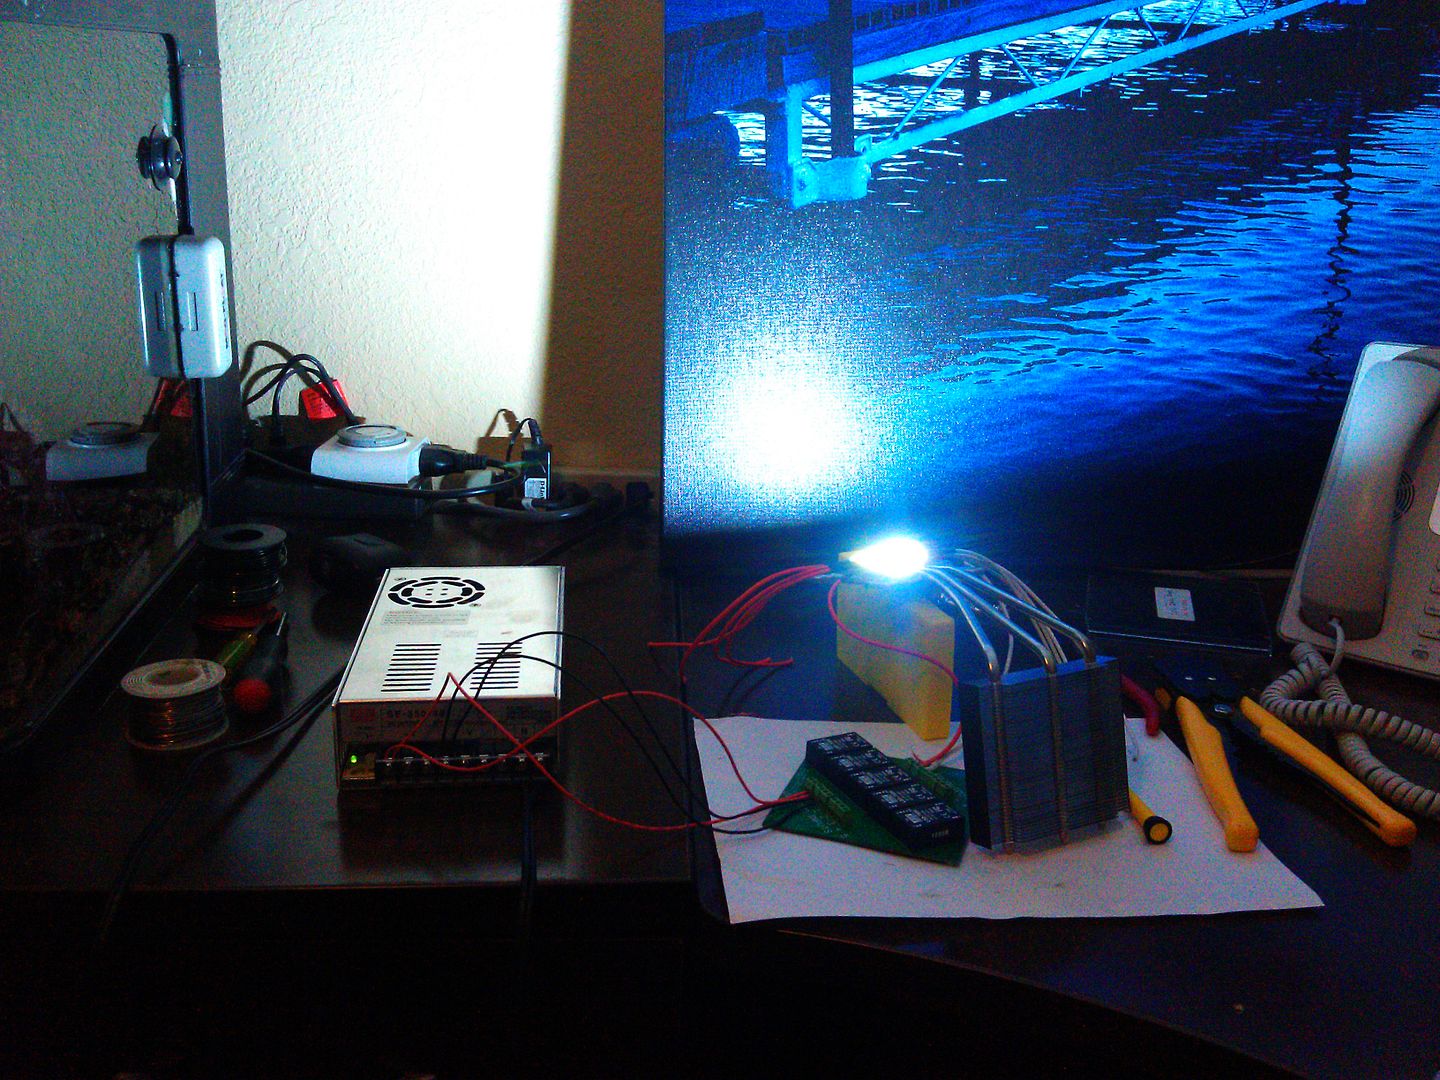
The next few days are getting the adafruit 16x pwm controller and RTC going since I finally have my light setup in and working:
I've re-written how I want my program to function with regard to handling everything at once about 5 times, but I'll get it how I want it eventually. Have you checked out some of the other Aquarium controller builds on here? There is one that is working well and logging online also, though not using the N+2 iirc. Currently working out a clock/time based scheduler for lighting.
The shield you built sounds cool, any details? I'd like to make a shield or breakout board that contains the needed pullup resistors and an RJ11 jack for both i2c and 1wire, as well as an containing an i2c I/O Expander so I can use all 8 of my relays and have room for level sensors and ph/salinity probes. Right now I'll likely just end up getting a solder bread board and trying to plan the best I can. I had the board you see in the picture above custom done at iTead studio, shipping from China meant it took about 10 days start to finish to get it, once you sent them the gerber files. Only downside is you have to have 10 made, upside is they're pretty cheap ($45 total with DHL shipping).
You can follow along with a more aquarium tilted view on RC if you like also:
Glad to have you following along and will certainly be anxious to swap ideas in the near future. I haven't seen any noise problems with my 1wire temp sensor so far, everything has been very stable but that's only with 1 sensor
The next few days are getting the adafruit 16x pwm controller and RTC going since I finally have my light setup in and working:
I've re-written how I want my program to function with regard to handling everything at once about 5 times, but I'll get it how I want it eventually. Have you checked out some of the other Aquarium controller builds on here? There is one that is working well and logging online also, though not using the N+2 iirc. Currently working out a clock/time based scheduler for lighting.
The shield you built sounds cool, any details? I'd like to make a shield or breakout board that contains the needed pullup resistors and an RJ11 jack for both i2c and 1wire, as well as an containing an i2c I/O Expander so I can use all 8 of my relays and have room for level sensors and ph/salinity probes. Right now I'll likely just end up getting a solder bread board and trying to plan the best I can. I had the board you see in the picture above custom done at iTead studio, shipping from China meant it took about 10 days start to finish to get it, once you sent them the gerber files. Only downside is you have to have 10 made, upside is they're pretty cheap ($45 total with DHL shipping).
You can follow along with a more aquarium tilted view on RC if you like also:
Cheers!
I took a look at itead studio, but I liked the options for fritzing.org better, they allow for single off, and their boards are Very well made including full plating of holes pads. I have the board up and running now and seems to be going great without the interference (I think I was picking up a lot of noise from nearby electronics and my ballasts.
I am rewriting my code to be more plug-and-play using the code I found by H07R0D at http://forums.netdui...ium-controller. check his out, great design. easy to modify.
Fritzing is good as well, I found iTead to be cheaper for 10 copies shipped than 1 there, however. I am taking lots of inspiration for my system from H07R0D's posts. I'm of course not aiming for anything that anyone else will find particularly useful as a complete product, so I get to specialize a bit more which is always good. So far so good, should have the 5 channel LED set up properly yet this weekend, and testing it out over my coral soon after. Had a hiccup where in I fried my N+2 but luckily it's just amazon.com 2 day away
I want to design and build a shield with a 1 wire hub hookup (RJ11 with the proper pull up resistor installed + 5v available) as well as an i2c hookup, and an i2c I/O expander on the shield so I can go all RJ11 & screw terminals. Not sure how/when I pull that off, but it's on the list when I'm ready to leave the breadboard behind.
I like the way you are going. I also am doing a "self project" with no expectation of making it commercial. I ended up bastardizing a under-monitor surge suppressor and put a set of relays, opto-iso's, and trigger transisters in it. ended up hooking it to my controller box via a DB9 connector (what I had on hand from the scrap bin). Everything else is self contained on the PCB shield I designed. I added a 6 digital/3 analog header to the shield so I can do future expansion without increasing the height of the package with another shield (although I still keep that as an option). When I next have the case open to swap out for the N+2 I will take some pictures and send you the gerber on what I designed. The only thing I need to change is the routing for the pull-up resistors on the RTC.
Look forward to pictures!! Are you logging anywhere?
not yet, more focused on getting the hardware working solid and have been dealing with "wetware" issues with some of my coral. Should be getting something going pretty soon though.
Got my 16 channel dimming working thanks to help from folks on the forum (special thanks: NOOM!) working now on my relay for outlet control and ATO (Auto Top off)- just need a few float switches and a little pump and away we go. My light build is going well, I have my big o'l LED pendant hanging above my test bed aquarium, just need to get the fan wired in, and a splash guard on it so I can test it for long periods of time.
Well, got some floats and a pump, here is my ATO logic so far, special thanks to Arron for the help on the interrupt N+2 compatibility and multifire issues.
This creates an interrupt port that can trigger events:
And then on startupI assign an event to happen if the interrupt fires (water drops) and check to see if the float is already down, if it is, the event won't fire as it fires when it goes down, not while down, so I have to manually fire the event:
SumpLevel1.OnInterrupt += new NativeEventHandler(waterLowEvent); if (SumpLevel1.Read()==false) // check for low water on start up, if so fire the event manually. { waterLowEvent(0, 0, DateTime.Now); } Thread.Sleep(Timeout.Infinite);
Now, the event that is being fired, I replaced turning on / off relays with Debug.Prints of what is going on:
static void waterLowEvent(uint data1, uint data2, DateTime time) { if((DateTime.Now - _lastFire).Duration() < WaitTime || _doneFilling == false || SumpLevel1.Read() != false) { return; } else { _doneFilling = false; } ledOnboard.DutyCycle = 1; Debug.Print("Pump Running"+ DateTime.Now.ToString()); while(SumpLevel1.Read()==false) //while still too low { Thread.Sleep(1000); //give it a 1 second pause so it doesn't flutter on / off Debug.Print("still low on water, pump running!"); } //finished filling, sensor says full. Debug.Print("Pump Turns Off" + DateTime.Now.ToString()); ledOnboard.DutyCycle = 0; _doneFilling = true; _lastFire = DateTime.Now; }
As you can see, I check to see if the event has fired in the last 1 second, and to make sure it's done filling (can't fire two events at once).
Then, I set a flag to say it's filling, and set the last fire time to right now. I light up an LED to tell me that the ATO is running, then go into a while loop. The while loop says basically "While the float stays down, wait for one second, then check again" once it's up, the pump turns off, i shut off the LED and set my variable of _doneFilling to true.
I'll add some additional floats for backup/etc and monitor the level of the ATO container as well eventually but it's a start to test the float.
Using a Netduino Plus 2 my controller does the following:
[*]Sets the time via the network [/list]
[*]Uses a float switch to fire an ATO via relay when it falls [/list]
[*]Uses an adafruit 16 channel PWM to dim up to 16 channels of LED lights (currently 5 channels for 1 LED pendant, there will be 3 total (3 x 5 channels), plus a PWM for the ATS) [/list]
[*]use a DS18B20 temp sensor to check the tank temp and turn on/off a heater via relay [/list]
Theoretically it's ready to run my little test reef (29 gallon bio cube). I've got a little more hardware work to do (splash shield for light, fan wiring, tidy up the controller, wire a few more relays) but it could work.
Things that will be added soon:
[*]Small LCD Screen for System Status [/list]
[*]LED's to indicate ATO running, heater running, etc [/list]
[*]"Feed Mode" where pumps (which need to be added to relays) turn off [/list]
[*]Fade functions for the light [/list]
[*]utilize fade function and time to program sunrise/sunset [/list]
[*]additional float switches to monitor for disaster situations [/list]
[*]water change mode that disables ATO feature [/list]
Things to add later:
[*]Other sensors (pH, ORP, conductivity) [/list]
[*]water sensors for floor/area [/list]
[*]weather patterns for lights (random cloudy days etc) [/list]
[*]power head control [/list]
I've attached the source here, if anyone cares to look at it.
Simulated my first sunrise this morning: it went great. Can't wait to coordinate 3 of the pendants to do some awesome things. The possibilities, are endless!
Going to have some time finally to work on it tonight, my first free night in probably 4 or 5 months and I roped it off to JUST this. I'm going to mount all my boards on a backer board, wire all my outlets on my power strip and get the controller board mounted on top of it. Hook up all 8 relays up, and then focus on programming. Hopefully get my LCD going, some more LED functions, etc.
end goal is to have it packaged much better by the end of the night.
Currently playing with an STM32F103VET6 from ebay. Using Mikrobasic.... pleased but frustrated and not sure if I want to invest in the IDE. Have been following the netduino progress for some time. Looks like it may be worth ordering a board or two. Although I love BASCOM-AVR and thus far have used it for all of my projects and still will for small stuff, the power of these ARM cpus is light years ahead for complex projects.