Netduino home hardware projects downloads community

Jump to content


The Netduino forums have been replaced by new forums at community.wildernesslabs.co. This site has been preserved for archival purposes only and the ability to make new accounts or posts has been turned off.
Photo

Monitor & Control your Garage Door with Android App


  • Please log in to reply
31 replies to this topic

#1 Greg Zimmers

Greg Zimmers

    Member

  • Members
  • PipPip
  • 11 posts
  • LocationBroomfield CO

Posted 16 September 2011 - 06:39 AM

[UPDATED 10/18/2011 - Added the complete Android project step by step]
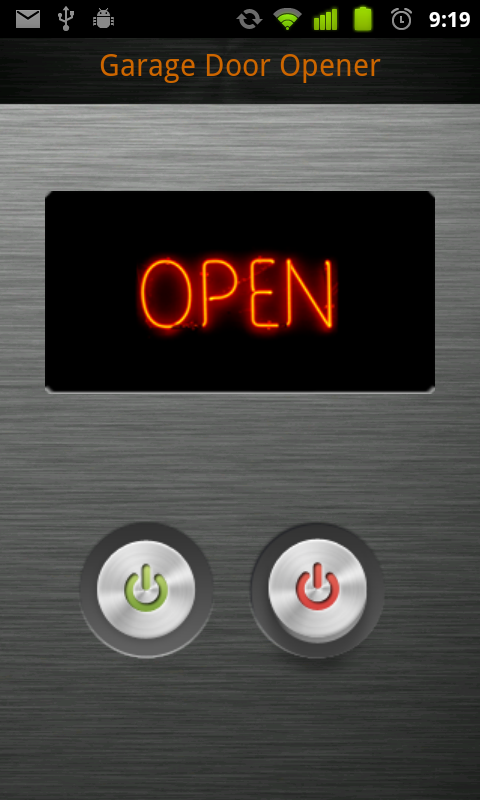
I have created an Android garage door monitor and opener. It connects to the Netdiuno plus over HTTP. I am now in the process of documenting the whole project. I am done with the whole project and now I am going back and documenting each step of the process. Here is the first step: Building and programming the infrared sensor. I chose infrared sensor because it's cheap ($1.13!) and I don't have to make physical contact with the door.

Android App
I am not going to post the entire step by step tutorial here since it's a little off topic for these forums.
If you are interested in Android programming, I posted step by step instructions for the android app that will control your garage door, on my blog. All source code is available for download, so you can use it as is or a starting point for you own project.

Read more about here. http://androidcodemo...e-door-app.html
Posted Image


Garage Door Opener
1a. Supplies
There are many ways to control your garage door with your Netduino. I decided to hack a spare garage door opener (since I wasn't using it) with an Optoisolator. My total cost $1.25. If I didn't have a spare garage door opener I would have run two wires off the Optoisolator pin 3 & 4 to the control panel in the garage. To send commands to the Netduino I am going to use HTTP commands.

  • Garage door opener
  • Optoisolator with Darlington Driver - 1 Channel. I purchased mine from Sparkfun.
  • 100 ohm resistor
  • 33 ohm resistor
  • Netduino plus (of course)
1b. Build it
Here is the schematic for interfacing with the garage door opener. Excuse my unsophisticated schematic as I don't own any electrical CAD software.
Posted Image


  • Connect the Optoisolator pin 1 (Anode) to the Netduino plus digital pin 13
  • Connect the Optoisolator pin 2 (Cathode) to a ground pin on the Netduino plus with a 33 ohm resistor in-line.
  • Connect the Optoisolator pin 3 (Emitter) to one side of the garage door opener push-button with a 100 ohm resistor in-line.
  • Connect the Optoisolator pin 4 (Collector) to the other side of the garge door opener push-button.
Here is mine all built. You may notice mine is wired for two garages although I only have one hooked up to the Netduino for this tutorial.
Posted Image


1c. Code it

For the code, I am going to start with a stubbed out web server code from my previous blog tutorial of mine. To get more information on the basic code for a web server see my previous blog post. After you download the code, open the project. Let's modify the code so we can send an HTTP request to the Netduino to activate the garage door opener. We are going to send a command to push the button on the garage door opener. We don't know if we are opening it or closing it since we are not yet monitoring the garage door status. We will combine this project to activate the garage door with the monitor code in a later post. Then we will be able to send the specific command "Open" or "Close".

The code is pretty straightforward, but if you want a more in-depth explanation you can visit blog post.


public class WebServer : IDisposable
    {
        private Socket socket = null;
        //open connection to onbaord led so we can blink it with every request
        private OutputPort led = new OutputPort(Pins.ONBOARD_LED, false);
        private OutputPort Garage2CarOpener = new OutputPort(Pins.GPIO_PIN_D13, false);

        public WebServer()
        {
            //Initialize Socket class
            socket = new Socket(AddressFamily.InterNetwork, SocketType.Stream, ProtocolType.Tcp);
            //Request and bind to an IP from DHCP server
            socket.Bind(new IPEndPoint(IPAddress.Any, 80));
            //Debug print our IP address
            Debug.Print(Microsoft.SPOT.Net.NetworkInformation.NetworkInterface.GetAllNetworkInterfaces()[0].IPAddress);
            //Start listen for web requests
            socket.Listen(10);
            ListenForRequest();
        }

        public void ListenForRequest()
        {
            while (true)
            {
                using (Socket clientSocket = socket.Accept())
                {
                    //Get clients IP
                    IPEndPoint clientIP = clientSocket.RemoteEndPoint as IPEndPoint;
                    EndPoint clientEndPoint = clientSocket.RemoteEndPoint;
                    //int byteCount = cSocket.Available;
                    int bytesReceived = clientSocket.Available;
                    if (bytesReceived > 0)
                    {
                        //Get request
                        byte[] buffer = new byte[bytesReceived];
                        int byteCount = clientSocket.Receive(buffer, bytesReceived, SocketFlags.None);
                        string request = new string(Encoding.UTF8.GetChars(buffer));
                        string firstLine = request.Substring(0, request.IndexOf('\n')); //Example "GET /activatedoor HTTP/1.1"
                        string[] words = firstLine.Split(' ');  //Split line into words
                        string command = string.Empty;
                        if( words.Length > 2)
                        {
                            string method = words[0]; //First word should be GET
                            command = words[1].TrimStart('/'); //Second word is our command - remove the forward slash
                        }
                        switch (command.ToLower())
                        {
                            case "activatedoor":
                                ActivateGarageDoor();
                                //Compose a response
                                string response = "I just opened or closed the garage!";
                                string header = "HTTP/1.0 200 OK\r\nContent-Type: text; charset=utf-8\r\nContent-Length: "
         		+ response.Length.ToString() + "\r\nConnection: close\r\n\r\n";
                                clientSocket.Send(Encoding.UTF8.GetBytes(header), header.Length, SocketFlags.None);
                                clientSocket.Send(Encoding.UTF8.GetBytes(response), response.Length, SocketFlags.None);
                                break;
                            default:
                                //Did not recognize command
                                response = "Bad command";
                                header = "HTTP/1.0 200 OK\r\nContent-Type: text; charset=utf-8\r\nContent-Length: " 
				+ response.Length.ToString() + "\r\nConnection: close\r\n\r\n";
                                clientSocket.Send(Encoding.UTF8.GetBytes(header), header.Length, SocketFlags.None);
                                clientSocket.Send(Encoding.UTF8.GetBytes(response), response.Length, SocketFlags.None);
                                break;
                        }
                    }
                }
            }
        }
        private void ActivateGarageDoor()
        {
            led.Write(true);                //Light on-board LED for visual cue
            Garage2CarOpener.Write(true);   //"Push" garage door button
            Thread.Sleep(1000); 			//For 1 second
            led.Write(false);   			//Turn off on-board LED
            Garage2CarOpener.Write(false);  //Turn off garage door button
        }
        #region IDisposable Members
        ~WebServer()
        {
            Dispose();
        }
        public void Dispose()
        {
            if (socket != null)
                socket.Close();
        }
        #endregion
    }

1.d Run it
Now run the code in debug mode (F5).
Posted Image

Open another a web browser and enter the IP address that the Netdiuno board displayed in the output window. For me its "http://192.168.0.153...3/activatedoor"
You should see the LED on the Netduino plus light and the door should open or close.

The complete code is attached to this post "NetduinoGarageDoorOpener.zip"

Garage Door Sensor
2a. Supplies

  • Optical Detector / Phototransistor $1.13 ( bought mine from Sparkfun)
  • 200 ohm resistor (under a buck from any almost anywhere)
  • 5.6K ohm resistor (under a buck from any almost anywhere)
  • (Optional) (2) Screw Terminals 3.5mm Pitch $1.25 ea.
  • (Optional) PC Board $2.19 for two.

2b. Build Garage Door Sensor
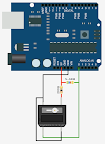
Here is the schematic for building the sensor.
Posted Image
view larger


Here it is built
Posted Image
view larger


Here it is installed
Posted Image
view larger

2c. Code the Garage Door Sensor

//Set the analog pin to monitor Pin 0
AnalogInput garageSensor = new AnalogInput(Pins.GPIO_PIN_A0);
//Set sensor range
garageSensor.SetRange(0, 1024);
//Program loop
while (true)
{
    Debug.Print(garageSensor.Read().ToString());
    Thread.Sleep(1000);
}


I will be adding the rest of the project to this posting as I finish documenting it. Here is what will be coming.
  • [Coming soon!] Program the Netduino webserver
  • [Coming soon!] Writing an android app to talk to the Netdiuno plus over HTTP

Attached Files


#2 Chris Walker

Chris Walker

    Secret Labs Staff

  • Moderators
  • 7767 posts
  • LocationNew York, NY

Posted 16 September 2011 - 06:47 AM

Hey that's pretty cool: a Netduino + Arduino project :) Two different open source platforms, working together... Nifty! Thanks for sharing this with us, Greg. Chris

#3 Christoc

Christoc

    Advanced Member

  • Members
  • PipPipPip
  • 127 posts
  • LocationBallwin, MO

Posted 16 September 2011 - 07:10 AM

I think you meant Netduino + Android ;) This is honestly a project I have thought would be great, I may have to do this as well as I always get paranoid "did I leave the garage door open"

View my blog at ChrisHammond.com

Projects: Netduino Tank/Tracked Vehicle, DNNFoos, Random other bits


#4 Chris Walker

Chris Walker

    Secret Labs Staff

  • Moderators
  • 7767 posts
  • LocationNew York, NY

Posted 16 September 2011 - 07:40 AM

I think you meant Netduino + Android ;)

Lol. I should have read that more carefully. When I saw the schematic using an Arduino, I assumed that there was an Arduino in the project too ;)

But Netduino + Android is cool too!

Chris

#5 Fred

Fred

    Advanced Member

  • Members
  • PipPipPip
  • 302 posts
  • LocationUK

Posted 16 September 2011 - 09:56 AM

Nice. I've got a similar project with a Netduino plus controlling the lighting and door in my garage. Link here. It sounds like you're going a similar route so give me a shout if I can be any help.

I used an optoisolator for reading the state of the garage door. Door control is done via a relay that goes in parallel with the door's push button.

Control is via URLs like /garage/door/open. It's wrapped in a UI that is a simple web page served from the Netduino . (You can see that on the link above.) I've now added a basic Android app the looks a little nicer but calls the same URLs, switches on WiFi as it starts up and stuff like that.

#6 Greg Zimmers

Greg Zimmers

    Member

  • Members
  • PipPip
  • 11 posts
  • LocationBroomfield CO

Posted 16 September 2011 - 03:25 PM

Nice. I've got a similar project with a Netduino plus controlling the lighting and door in my garage. Link here. It sounds like you're going a similar route so give me a shout if I can be any help.

I used an optoisolator for reading the state of the garage door. Door control is done via a relay that goes in parallel with the door's push button.

Control is via URLs like /garage/door/open. It's wrapped in a UI that is a simple web page served from the Netduino . (You can see that on the link above.) I've now added a basic Android app the looks a little nicer but calls the same URLs, switches on WiFi as it starts up and stuff like that.


Actually the entire project is complete, I am now documenting it to share with others. Thanks for sharing your project I am very interested in how you detect the door state. I was not as brave as you; opening up the garage door unit and mixing high and low voltage. I was attracted to the infrared sensor because it was cheap and not intrusive. Have you posted any schematics? I would be interested in learning from what you have done.

#7 Fred

Fred

    Advanced Member

  • Members
  • PipPipPip
  • 302 posts
  • LocationUK

Posted 16 September 2011 - 06:55 PM

Looking forward to seeing your complete project. I'm afraid I'm a bit useless at documenting what I've done. The IR sensor seems like a perfectly good way to detect the door state. However, hacking into the opener wan't too difficult and I was already switching mains voltage (via relays) for the lights. All I did was: - Find a likely point for measuring, near some switches used to detect the end of travel. (One for open, one for closed.) - Measure the voltage. - Pick a suitable resistor and attach a LED so you can see if you got it right. - Swap the LED for the input of an optoisolator.

#8 smcgrath

smcgrath

    New Member

  • Members
  • Pip
  • 2 posts

Posted 15 October 2011 - 04:21 AM

Glad I found some others that have worked on a project like this. I thought I would share what I was able to come up with to also remotely access and control my garage door. I was able to do this all with an old Android phone, a BT headset, a transistor, and a few free Android Aps. Check out the website I put together to detail out the steps. www.didicloseit.com or you can view the you tube video directly at http://www.youtube.c...?v=CJ0j_vZ4AeM.

#9 smcgrath

smcgrath

    New Member

  • Members
  • Pip
  • 2 posts

Posted 15 October 2011 - 04:42 AM

Greg, what is the Android App you created? I'd like to check it out.

#10 Greg Zimmers

Greg Zimmers

    Member

  • Members
  • PipPip
  • 11 posts
  • LocationBroomfield CO

Posted 18 October 2011 - 03:02 PM

Greg, what is the Android App you created? I'd like to check it out.


Just finished documenting the Android app. I have provided a link to the my blog post which goes through the app source code step by step. I also provide a link to download the complete project to use as is or as a starting point for your own app.

I didn't want to post the entire tutorial here since its a bit off topic and I am sure not everyone is interested in Android programming. But if you are here is the link.
http://androidcodemo...e-door-app.html

#11 Sharktear

Sharktear

    Member

  • Members
  • PipPip
  • 11 posts

Posted 28 October 2011 - 11:01 AM

Just finished documenting the Android app. I have provided a link to the my blog post which goes through the app source code step by step. I also provide a link to download the complete project to use as is or as a starting point for your own app.

I didn't want to post the entire tutorial here since its a bit off topic and I am sure not everyone is interested in Android programming. But if you are here is the link.
http://androidcodemo...e-door-app.html


Hi, I've tried your application with some modification (I turn on/off a relay instead of open a garage door), but while connecting from a browser all works fine, from the Android application and also from the Android browser I can't connect to the netduino (in my case http://192.168.0.7/relay_on is the command). I exclude a problem in my LAN because if I browse the ip of the router (192.168.0.1) from android, I have no problem. The strange thing is that from any other pc on my lan, all works fine... the problem is only from my android smartphone. Any suggest?
If I put a breakpoint in the netduino application (in the ListenForRequest() method) the execution never reach this point.
Thanks in advance for any suggestion.

#12 Greg Zimmers

Greg Zimmers

    Member

  • Members
  • PipPip
  • 11 posts
  • LocationBroomfield CO

Posted 30 October 2011 - 12:03 AM

Hi, I've tried your application with some modification (I turn on/off a relay instead of open a garage door), but while connecting from a browser all works fine, from the Android application and also from the Android browser I can't connect to the netduino (in my case http://192.168.0.7/relay_on is the command). I exclude a problem in my LAN because if I browse the ip of the router (192.168.0.1) from android, I have no problem. The strange thing is that from any other pc on my lan, all works fine... the problem is only from my android smartphone. Any suggest?
If I put a breakpoint in the netduino application (in the ListenForRequest() method) the execution never reach this point.
Thanks in advance for any suggestion.


I have noticed some issues communicating between Android and the Netduino. It actually took me a long time to discover you can't step through your Android code and watch the HTTP client execute a call to the Netduino. Whenever I did step through my code it failed 100% of the time. Since this is just a demo app and my actual app involves a second IIS web server, that sits between the Android and the Netduino, I solved the issue by making up to 5 HTTP calls. That seems to work reliably for me.

#13 monewwq1

monewwq1

    Advanced Member

  • Members
  • PipPipPip
  • 104 posts

Posted 30 October 2011 - 02:52 AM

I exclude a problem in my LAN because if I browse the ip of the router (192.168.0.1) from android, I have no problem. The strange thing is that from any other pc on my lan, all works fine... the problem is only from my android smartphone. Any suggest?


Just because you can browse the ip of the router does not mean that there is not a router configuration problem. Perhaps the router is blocking requests to port 80 or whatever TCP port you have configured for your web server. So if you go to http://192.168.0.1, all is fine because the Android phone is connected to the same router connection as your other computers (192.168.0.1 is probably the Default Gateway IP address) and the router is configured to allow local connections to its configuration pages. But if you go to http://192.168.0.7/relay_on, the router is internally blocking that request. I would check the port forwarding and firewall configuration of the router and make sure it is not blocking certain port requests from your Android phone. Some routers have internal log files that you can view to see if that is happening.

#14 boelter

boelter

    New Member

  • Members
  • Pip
  • 2 posts

Posted 03 November 2011 - 06:01 PM

First of all, thank you for documenting your work -- I've never done anything like this before and it's been extremely easy to follow and duplicate thus far... with one exception. I've set up the IR sensor as instructed, and my output when debugging indeed shows that the ir sensor is... well... sensing objects. However, it's only sensing an object when it is extremely close to the sensor (like literally 1/8th to 1/16th of an inch). I get readings of 1024 up until i'm that close, then they drop off to ~10-20. At first I thought I possibly had a defunct sensor (fortunately i bought two), but I'm having the same results with both. I'm using two 100ohm resistors in series in place of the 200ohm, but I assume that wouldn't make any difference. Any light you could shed on this would be greatly appreciated as i'm so close to a finished project. Thanks! -jeremy

#15 Greg Zimmers

Greg Zimmers

    Member

  • Members
  • PipPip
  • 11 posts
  • LocationBroomfield CO

Posted 04 November 2011 - 02:43 PM

First of all, thank you for documenting your work -- I've never done anything like this before and it's been extremely easy to follow and duplicate thus far... with one exception.

I've set up the IR sensor as instructed, and my output when debugging indeed shows that the ir sensor is... well... sensing objects. However, it's only sensing an object when it is extremely close to the sensor (like literally 1/8th to 1/16th of an inch). I get readings of 1024 up until i'm that close, then they drop off to ~10-20.

At first I thought I possibly had a defunct sensor (fortunately i bought two), but I'm having the same results with both. I'm using two 100ohm resistors in series in place of the 200ohm, but I assume that wouldn't make any difference.

Any light you could shed on this would be greatly appreciated as i'm so close to a finished project.

Thanks!

-jeremy


Yes your results from the IR sensor seem accurate. The one disadvantage of the IR sensor is that is must be mounted very close (sensor only reads very close objects). I was worried about it as well, but my tests showed I could get reliable results and it is a cheaper sensor than a proximity sensor (around $10+). To get reliable results I mounted my IR sensor on the side rail. It faced the broad support plate on the door providing a good reading. Be creative where you mount the IR sensor. Any location that will give you different readings when the door is open versus closed will work.

Posted Image


If you need I can post more pictures how I mounted the IR sensor. If you can't find a reliable location for the IR sensor that will place it within an 1/8th of inch of your door (doesn't matter if it's when it's closed or open) you could switch to a proximity sensor. A proximity sensor can be located much farther away and give you a significantly more accurate distance reading.

I think its great your duplicating the project. If you run into any other issues, feel free to post your questions, I would be glad to help if I can. Please post an update after you have completed it!

#16 Ryan T

Ryan T

    New Member

  • Members
  • Pip
  • 5 posts

Posted 29 November 2011 - 08:47 PM

Hi all, Is anyone else having the problem of a blank “200 OK” status response returning about half the time when sending a request? I'm running your code basically untouched (using a static IP is the only change). I tried changing the response in the code to “201 OK”, this changed the expected response to “201 OK” but the phantom blank one remains at “200 OK”. Also unplugging the Ethernet cable from the Netduino+ results in a no response error. Any help or ideas on this issue would be greatly appreciated. Thanks PS. I have limited networking experience and am new to C#, .NET, Visual Studios

#17 Stealthrt

Stealthrt

    New Member

  • Members
  • Pip
  • 1 posts

Posted 02 January 2012 - 06:39 AM

Is it possible to hard code the IP in somewhere in the code? Thanks! David

#18 Verde

Verde

    New Member

  • Members
  • Pip
  • 1 posts

Posted 18 January 2012 - 05:02 PM

Great job! I have implemented this and added email notifications. My next goal is to add some sort of authentication to prevent unauthorized access to my garage. I know the public IP and custom port are a deterrent, but I would feel better with some sort of password entry. I will let you know if/when I come up with something.

#19 Fred

Fred

    Advanced Member

  • Members
  • PipPipPip
  • 302 posts
  • LocationUK

Posted 18 January 2012 - 08:35 PM

I restricted mine to my internal network and didn't forward the port from the internet. That way it's secured by my wifi password. Why would I want to control the door if I'm not there anyway?

#20 boelter

boelter

    New Member

  • Members
  • Pip
  • 2 posts

Posted 18 January 2012 - 08:45 PM

Why would I want to control the door if I'm not there anyway?


That's why I built mine, actually. Kids, wife and occasionally even I leave the door open on our way out for the day. It'll be nice to get a notification and be able to shut it remotely. Right now, I poll the sensor every few seconds and if I get < 1000 (open) for more than a few minutes it sends a txt message.

Eventually I'll be using SSH to tunnel into a linux host inside my home network. I'm having a friend rewrite the android app to include the ability change the IP on the fly. Until then, I only use it at home.


0 user(s) are reading this topic

0 members, 0 guests, 0 anonymous users

home    hardware    projects    downloads    community    where to buy    contact Copyright © 2016 Wilderness Labs Inc.  |  Legal   |   CC BY-SA
This webpage is licensed under a Creative Commons Attribution-ShareAlike License.